Saturday, November 13, 2010

Mad Men Era: Green Silk Cocktail Coat


Vintage fashion from the late 1950's or early 1960's can be created in silhouettes that stop traffic. Mad Men style, it's something to wear this winter.

Sometimes something perfect comes along, and this emerald green cocktail coat from Sak's Fifth Avenue is one of those moments in fashion history. Sculptural and refined, it's waiting for an evening on the town or keeping off the sea breeze when you admire the view of Hollywood from a hillside terrace.

Green Silk Satin Cocktail Coat: Sak's Fifth Avenue

Saturday, October 23, 2010

1960's MOD Fashions to Wear or Sew

Sewing dresses can be fun and easier than you think. 1960's fashions have such cute styles that seem very wearable right now. Yes, that center style has a divided skirt! I could see sewing up a few for spring, or even some in heavier fabrics for winter. How cute would these be with leggings and boots?

These dresses are all from vintage BUTTERICK patterns of that era. With so many cool vintage patterns selling on Etsy and other sites online, I think it wouldn't be too hard to look them up for yourself. I find these older patterns have excellent pattern instructions that are easy to work from.

Here are the back views with pattern numbers, so you can get a good idea about the styles.
Would you use a 60's pattern to sew a dress like the ones here?


If you collect or wear vintage, this group of styles dates from Spring, 1967. Using patterns can be a great way to help with dating vintage garments too.


Saturday, September 25, 2010

Sewing Vintage Styles: Vogue Vintage Patterns, 8686 & 8687

Vogue 8687
Vogue 8687

Vintage style sewing patterns Vogue 8686 and Vogue 8687 offer a great way to get a retro look with a more modern fit. Fall is a good time to start a sewing project and these two patterns would sew up well in light weight wools or wool blends.

The Vogue 8687 ensemble above has a 1950's coat style that would be easy to sew. It could be made to be worn alone. This coat would be perfect in many weights of fabric, from brocade for evening to gabardine, plaid or canvas for outer wear. The body of the coat is cut in one with the sleeves, so it is a great project for the sewist who might be afraid of a difficult and complicated coat pattern.

The sleeveless sheath included in this pattern could also be worn alone. 1950's styles are often seen in silk florals, brocades, solid crepes or linens (great for spring and summer). For a more modern twist why not try a light wool men's wear gabardine.

Of course, you can go with the suggested ensemble and create the set. I have in my collection a gorgeous dress and coat set in black wool crepe lined in silk with a black and white abstract design. This pattern is a super way to showcase a dramatic silk print. Another alternative is to make the sheath bodice in the same silk to match. As a lining, the print will come as a suprise when you take off the coat with a flourish!

Vogue 8686
Vogue 8686

Vogue 8686 has a mid-1930's style with a slender skirt and wider upper body typical of the period. When looking for the right fabric, try to find one with enough drape to reveal the body. If the fabric has too much shape, this dress could look bulky and stiff. I think that a wool crepe would be nice and have the right vintage look.

The bodice pattern has small bust gathers at the waistline, typical of the early to mid-1930's. It may not have enough shape for a larger bustline. Sizes bigger than a B cup may want to make a muslin fit sample and add shape to the midriff with a waistline bust dart to decrease the bodice fullness.

This dress would be a knock-out, especially of you can find a great bakelite buckle to go with it!

Thursday, September 2, 2010

SEWING VINTAGE: 'S' Curve Darts & Flat Lining as Facing


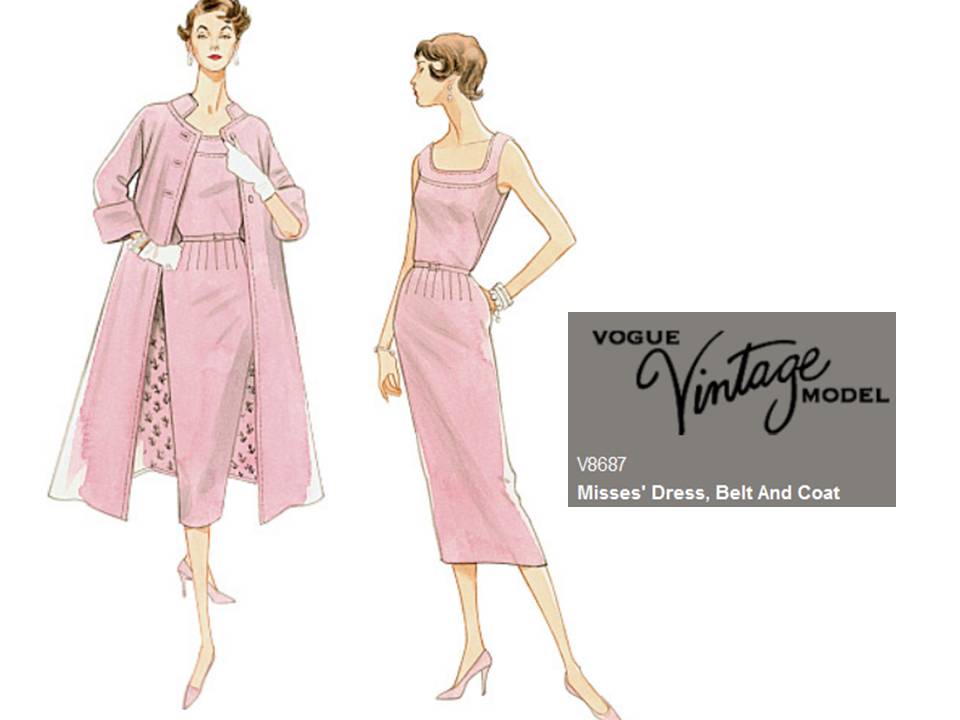
Sewing vintage patterns from the 1940's, 1950's and early 1960's is fun, but getting the right look often requires sewing methods we don't see today. Learning how to sew the styles you like will make it easier to get the look you want. One method is flat lining, and here I want to show a fast and easy way to sew. Our modern fusible interfacings have made traditional flat lining unnecessary. It can have advantages though, and I thought I would share those with you.

Another out dated construction technique is the "S" shaped dart. A straight dart creates at flat curve. In some cases, that is what we want. However, if you are trying to get an hour glass fit to your bodice, than you might want to consider an "S" shaped dart. Glove fitting dresses like those produced by Lanz in the 1950's reveal this dart shape: it hugs the rib cage and curves around the bustline for a smooth body fit.


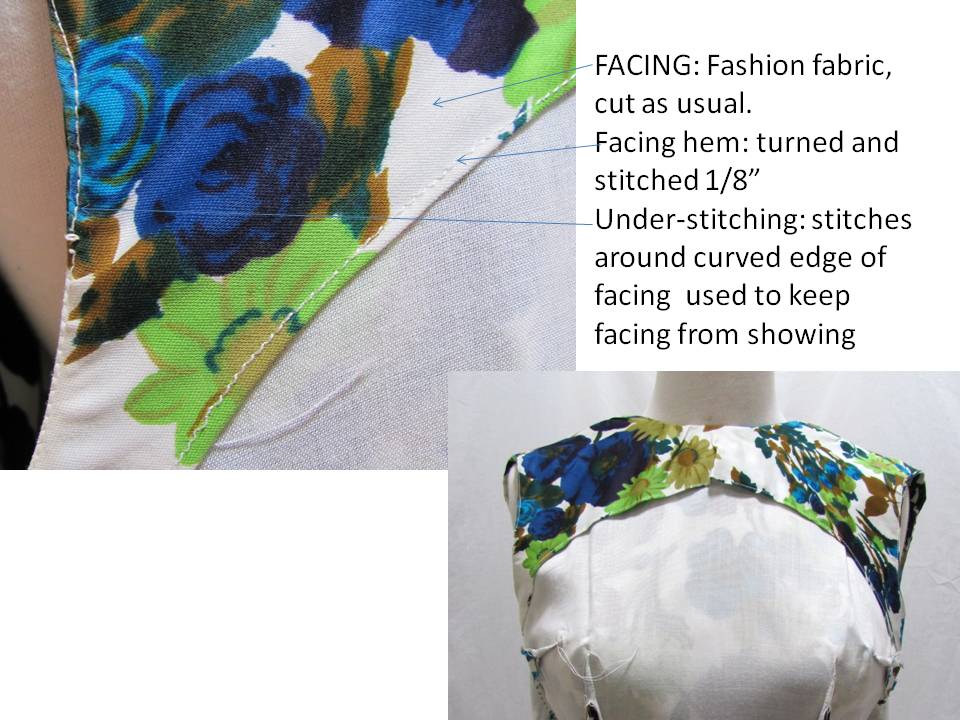
This light-weight summer cotton dress would wrinkle, and perhaps pull at the seams without this inner construction method. A cool cotton faces the fashion fabric, creating a stronger bodice to the flowing skirt.

FLAT LINING as FACING

Briefly, this method uses a cotton lining that is cut at the same time as the fashion fabric. This is sewn around the neckline and if it is sleeveless, the armholes. This bodice is then turned to the right side. At this point the darts can be sewn and the side seams completed.

This is a fast method that eliminates the need for facing in most cases. The time spent cutting out facing and finishing those edges will be saved.

Open side seams allow for further fitting and adjustments in the future. The top edge at the armhole can be hand sewn to reinforce that upper edge. This method works for both sleeveless styles and bodices with sleeves.


'S' CURVE DART

The dart will have an smooth seam line up the rib cage, then curve around the bottom of the bust, tapering to a fine line at the end. An 'S' curved bodice dart will create a smooth fitting bodice. It has to be fitted on the body, and should be developed in the pattern stage. However, it can be pinned into place after the bodice is flat lined.

POINT OF BUST

This is the bustline center. Do not end darts here because that will make pointed darts. Imagine a Quarter sized circle around the point of bust (it's OK to draw this onto your lining). End the dart point at that circle perimeter line.

FITTING

1-BASTE the side darts, using your machine's largest stitch length

2-BASTE the side seams together

3-TRY ON the bodice

4-PIN the back seam together down the seam line

5-PIN in the front bodice darts, shaping them to the rib cage and around the bustline, creating an 'S' curve dart.

6-MARKING: after fitting, remove the bodice for marking. You may mark the dart position on the lining with chalk or pencil before you sew these darts. The two darts should be 'balanced' visually but they may not be exactly the same. As long as the bodice side seams are in the correct location (down your body sides), then they should be fine. No one is exactly the same on both sides of their body, so your darts may reflect that as well.

7-CLIPPING: some 'S' curve darts require clipping so that they can be pressed open. Trim away excess fabric to create a 1/2" seam allowance up the dart. If you have a serger, you can finish these cut seams to prevent unraveling (or zig-zag over the edges).

8-PRESSING: these darts can be pressed open, or towards the front. On this bodice the seams were overlocked together and pressed towards center front. Often the fabric bulk requires that they are pressed open.


-----------------------------------------
HOW TO FLAT LINE as FACING:
STEP-BY-STEP


LINING and FASHION FABRIC

On your cutting surface, lay out the fashion fabric 'face down'. Over this, lay on the cotton lining. Smooth out bubbles and align the selvage edges. Pin on pattern (this method will need a pattern for each part, as it doesn't have a center fold). Cut out the pattern.

SEWING

1-Separate the lining and fashion fabrics. Sew the lining fabric shoulder seams and bodice fabric shoulder seams. Press those seams open.

2-On the work surface: lay out the fashion fabric bodice, face up. Over this, lay the lining bodice, face down. The two layers will now be facing each other. Pin together, matching the shoulder seams, then smooth the fabric flat so that all edges meet.

3-SEW around the neckline and armholes. Clip the seam allowances around these curves.

4-TURN the bodices to the right side so the good sides are now facing out, press flat. Match all edges and pin together so that the fabric doesn't shift apart.

5-OVERLOCK unfinished edges, with both layers together: side seams, waistlines and back seams. If you do not have a serger, trim these edges neatly then zig-zag overcast with a wide stitch.

6-FITTING: (see notes above)

7-DARTS: sew bodice darts (see "S" curve dart)

8-SIDE SEAM: this seam will be sewn, then opened flat. The top edge can be reinforced by hand stitching to keep it open. This type of seam will allow for alterations in fit.

9-NECKLINE and ARMHOLE edges can be edge stitched to create a crisp, flat edge.
The bodice is now ready for the skirt to be sewn on to it.

------------------------------------------

I hope you can try this flat lining technique with your next project. I think you will really like the results. If you have had your own experience flat lining, let us know how that worked out.

note: I used a display form for these photos who is sizes smaller than the dresses shown. You will notice the fit isn't correct, try to imagine it is.

Wednesday, August 25, 2010

Flappers on Film: Vintage Kodak footage in Color


Flappers, the wild and young generation of the 1920's are back with us once more. Captured by the medium of colored film, several actresses of 1922 are shown HERE in self conscious poses, gestures and movements. Kodak film experiments of that era recorded for us a generation that is now long gone, but is still a strong influence on us today. Enjoy this video, it's such an intimate peek into their lives.

Doing the math, if the young women in these shots were about 22 years old, then they would have been 110 this year.

photo image above is a random flapper photo that is not seen in this film, but I like her anyway

Saturday, August 21, 2010

Pioneers in California Fashion: Peggy Hunt and the Affliliated Fashionists

Peggy Hunt
California fashion industry was well under way by the 1920's. Los Angeles had found its niche in two important local businesses: Hollywood and Tourism. This meant that by creating a strong brand identification with both the luxury of resort and sun sports, along with Hollywood and the glamour associated with it, a new identification was found for a growing apparel industry in the region.

During the 1920’s, the fashion industry saw several new trade and marketing organizations develop. The Associated Apparel Manufacturers of Los Angeles and the California Fashion Creators were important firsts during this decade of growth. The Fashion Creators would stage fashion shows at movie star homes to market new designs to the public.

By 1921 the Associated Apparel Manufactures of Los Angeles established a bureau of information, employment office, and a buyers office for out of town buyers. This meant that the fashion industry now had a core or 'go to' for information and marketing events.

In 1926, a group of 6 female designers, who owned their own businesses, formed the Affiliated Fashionist group. Its purpose was to promote their companies with many social events and fashion shows, often staged in the designer's homes, around a pool or outdoor Los Angeles theme. The first members were: Irene Bury, Viola Dimmitt, Peggy Hunt, Violet Tatum, Pat Perkins, Marjorie Montgomery, Addie Masters, Louella Ballernio, Agnes Barrett, and Mabs Barnes. Nearly 40 years later (in 1962) Peggy Hunt, Marjorie Montgomery, and Addie Masters were still in business. Violet Tatum and Pat Perkins had retired from the group early.

Several members, such as Mabs Barnes, who in 1933 would create the Satin lastex swimsuit with a one-piece skirt panel in front and bustline fit, went on to design important innovations and trends. Addie Masters specialized in glamorous, yet casual at home fashions with a “wrap-rascal” dress and hostess trousers in 1939.

In September of 1946, the group staged a fashion show at Peggy Hunt’s estate that was attended by 400 guests and showcased 72 styles. Resort and cruise wear fashions predominated. Ethel Joutras was the co-ordinating director of the event where the following fashions were featured:

Addie Masters: cover-up group in black and white, exercise suit that was a one-piece play suit with shorts and blouse

Marjorie Montgomery: play suit in turquoise

Viola Dimmitt: raincoat-dress, a coat that could be worn as a dress, made from black nylon

Agness Barrett: slacks and fashions with a Mexican color theme

Mabs Barnes: lingerie

Peggy Hunt: black crepe with nude sheers, and a junior line with Children and Teen styles, and another group called "Jean Carol" that featured women’s dresses. During WWII, actress Deanna Durbin was costumed in a ‘Jean Carol’ label for a movie. Peggy was the first to show sheer-yoke cocktail dresses.

Jeannette Alexander: dresses with a focus on the young sophisticate (Jeannette Alexander was Peggy Hunt’s daughter)

A press release in 1948, showed that at that time there were 8 designer members in the group. They were following Paris trends with 12” hems for day, and 9,10,11” for night. At this event, Peggy Hunt showed lace and marquisette accents and floor length gowns.

Louella Ballerino presented “American Gothic” dresses with subdued coloring. In 1950 she would show drapery prints in her dresses. Her styles were part of an "Americana" trend that may have spun off of the success of the musical "Oklahoma" in 1943. Agnes Barrett, like Louella presented nostalgic styles with a Victorian look that included braid trims, tucks, and skirts that flared in back.

Marjorie Montgomery designed for college girls with new looks in dolman sleeves, petal collars and cuffs, and easy skirts. Irene Bury kept to her classics and showed an afternoon dress in a green and white stripe.

Louella Ballerino also showed resort sportswear featuring a strapless bra in a black and white print, white shorts, with wrap skirt. Addie Masters continued her casual resort wear with at-home fashions in crepe of tangerines and pinks.

Mabs Barnes had little change in her now popular swimwear styles, but she did feature new colors and fabrics, with control panties, and girdles.

Viola Dimmett's coats were water repellent with full backs and some hoods, worn belted or loose, styles that made her label a big seller.

From the early years of the 20th century through to the 1960's, growth for a new apparel industry in southern California was enhanced by these innovative fashion pioneers. They are partly responsible for the strong brand identification that California fashion has in the world. They promoted their designs with marketing innovations that proved successful, creating a California "style" that local designers today still rely on.

The cocktail dress shown here by Peggy Hunt features her well known nude sheer yoke and black silk chiffon with bias cascade. It probably dates from the late 1950's or early 1960's.

Thursday, August 12, 2010

1940's Hawaiian styles and Lauren Bacall

Audree Gay Creations, California, c. late 1930's through 1940's

I saw the Alfred Shaheen exhibit of Hawaiian fashions recently and it brought to mind this sultry gown in an aloha print fabric. The fashion styling blends a bit of Pacific sarong skirt with a mainland cowl neck top. A flash of midriff is seen between the skirt and cropped top that is held in place by the insertion of a center front tab, attaching the skirt to bodice. This cocktail or evening style would have been a sensation on the dance floor of the WWII era ball room or private patio party.

It is made from a fine navy blue rayon crepe with white floral design, to immitate the better Japanese kabe crepe that was first imported and later inspired the Hawaiian tropicals of the 1930's and 1940's pre-war years.


To Have and Have Not,1944, Lauren Bacall, designer Milo Anderson (1910-1984)

The aloha print rayon dress is similar to a sleek version of the same style by Milo Anderson for Lauren Bacall in 1944. Her sarong skirt and midriff top are linked (literally) by a metal ring: a style that would take fire in the 1970's. Her top is more artfully custom draped, but the overall sense of style is still the same: bared midriff with a tropical front draped skirt.

It is interesting that this flattering style is so seldom seen in fashion. The concept is a perfect example of 'less is more' when it comes to body exposure!

Monday, August 2, 2010

Vintage Fashion: 1950's Shelf Bust


The shelf bust in vintage fashion is always a fun style to see. It is nearly daring, a bit outrageous, and always eye-catching. A recent blog post by Gertie on shelf bustlines presented a great gallery of styles that show a variety of versions. Many are draped, a few are pleated.

I remembered this dress from my California collection, and decided to share it with you. Maybe you will get some inspiration from seeing it up close and personal.

The dress itself is a heavy, crisp black faille, with the same fabric used for the bustline. Its late 1940's or early 1950's flange hip pockets help to balance out this imposing shelf bust and collar in white.

The label says it is "A Filmland Creation" by "Miss Hollywood". I"m guessing if you wear it, you will get discovered, or in the very least mistaken for Jane Russell or Marilyn's cousin, new in town and ready to be cast in a leading roll.

Wednesday, July 28, 2010

Anatomy of a DRESS: Flat Lining in a 1960's Dress

1960's Print Dress in a cotton screen print, I.Magnin label

Sewing vintage styles can be a new experience if you have been sewing crafts and modern fashions. One of the best ways to learn how-to sew dresses, especially vintage dresses, is to study examples. Trying to get the right effect usually means following the same, or similar sewing techniques along the way.

I am going to take you through a close look at this cute Mad Men era dress, to see what makes it 'tick' and how you can get the same professional results when you sew vintage.


This dress has two personalities, the fashion fabric exterior, and the technical interior. What makes this dress seem smooth and well fit is a simple process termed flat lining.

Flat lining
This technique is used for many (most?) dresses made before knits came into fashion during the late 1960's. Simply, it is a method where the fashion fabric is backed by a lining. Both are cut at the same time, stabilized by sewing around all edges to make them handle like one fabric, then sewn into the garment.

Darts and seams are sewn after the fashion fabric has been flat lined.
In this example, white cotton broadcloth has been used to flat line the cotton fashion fabric.

Why cotton broadcloth?
Since the fashion shell is cotton, using cotton in the lining will retain the cool property of the original fashion fabric. Cotton is also strong, and will prevent the seams from pulling out or the skirt from stretching while seated. It can also be washable, although this garment was not designed to be laundered.


This inside view shows the details of a bodice.

Flat lining: the white cotton can be seen as the inner layer that is sewn to the fashion fabric around all edges about 1/4" from those edges. It was trimmed with pinking shears.

Dart: the dart has been slashed and spread open to minimize bulk. In the preparation process both fabric layers were sewn 1/4" from the edge as shown

Waistline: to keep the waistline from ripping out or popping stitches, wide twill tape was sewn over the seamline where bodice meets skirt. Also notice that the skirt is flat lined. Sometimes the skirt is not flat lined if it is very full or gathered.


Hem tape: This close look at the hem shows how hem tape is sewn to the edge of the hem, then it is turned up and stitched to the flat lining. If done this way, the hem stitches will not show. Hem tape does two things: it keeps the hem edge from unraveling while it provides a non-bulky method of sewing it up. A hem that has been turned back and machine sewn before hemming has two layers, and will often leave a shadow or thickness. This way the hem is not 'pressed' forward into the skirt fabric where it will leave a mark when pressing.


Facing: Facing will clean finish the neckline and armholes. The edge here has been turned and stitched to prevent unraveling.

Under-stitching: Stitching around the curved edges of the arm hole and neckline will prevent the lining from pulling and showing when worn. These stitches are around the seamline, but sewn only on the facing. This is different from top stitching.

HOW TO FLAT LINE

Getting started: Start with a big, smooth cutting surface (probably your floor).

#1--Lay out the flat lining fabric, be sure it is straight and on grain (not crooked).

#2--Spread the fashion fabric 'face' up over the lining, smooth it out to remove bubbles and wrinkles, be sure the grain lines match by aligning the selvage edges. If possible, press both layers. This will help to smooth them out and creates a 'bond' between them.

#3--Pin selvage edges together so they won't shift as you work.

#4--Layout pattern as usual. Because this method uses the fabric in an open layout, with out a center fold, you may need to flip some patterns to get both right and left sides. For the bodice front, tape tissue to the center front line of your pattern, fold down center front and cut around the cutting lines. When cut, open tissue and you should have a full front pattern with both left and right sides. While laying out the pattern, consider the print of your fabric as well, since you can see both left and right sides clearly during layout process.

#5--Pin pattern pieces to the fabric and cut through both layers. Keep shears perpendicular to the cutting surface. Cutting at an angle will make the layers different.

#6--Transfer pins when removing the paper pattern to pin only the fabric 'sandwich' piece. Pin away from edges to keep fabric from shifting.

#7--Machine sew around each fabric 'sandwich' piece using 1/4" seam lines and a medium length stitch. MODERN: use an overlock to clean finish all edges instead, but don't trim off fabric or you will reduce the pattern size (!!!)

#8--Your flat lining process is complete. Now proceed with marking your pattern and preparing to sew.

Sew your dress as usual, following pattern instructions and refering to your sewing books for more details. Remember to press the seams open because the extra layers will add up to more bulk.

I think you will be happy with the results. Let me know if you have further questions about this technique.