Showing posts with label sewing dresses. Show all posts
Tuesday, August 5, 2014
6 EASY TO SEW Shift Dresses
Finding a good easy to sew dress pattern for a new sewist can be frustrating. The styles can be bland and boring or the pattern design is really alot more complicated that it looks. Here are six dresses that can get someone new to sewing started with a dress that is cute, fashionable and fun to sew.
This blog post started with a letter asking me if I knew of a sewing pattern that might make up into a dress currently sold online. I took a look at the dress (by Jones New York) and saw that it is a perfect style for anyone to sew.
The basic silhouette is a loose fitting shift style (not fitted by darts or seam lines), and there are no set-in sleeves to worry about. The design has great 'blocking' with stripes used on the horizontal at the hem and shoulders, while they are vertical in the torso (how flattering!). I also like the idea of sewing a loose fitting shift dress as a first project because often the back zipper can be eliminated, making it a 'pull-over' style. The horizontal seam lines in the skirt and upper body will need to be added to some patterns. Here are the best six sewing patterns to choose from.
The two dresses above stood out as being most like the original dress: Butterick 5211 and Vogue 1300. The Butterick dress is just about perfect for this project as it already shows a horizontal seam across the upper body, no back zipper, and short 'kimono' sleeves. Very similar, the Vogue dress has shorter 'sleeves'. The front cascade ruffle on this pattern can be eliminated by taping the two front pieces together to make a single front pattern piece. Both patterns will need to have the hem panel cut across the lower skirt.
A more curvacious figure will probably look better with bustline darts. These two patterns include those fitting darts. The pattern at the right, Vogue 8805 is ready to go, with both hem panel and upper body seams. The 'shoulder width' may be cut back to create a short sleeve if desired. McCalls 6465 on the left also has a hem panel. It differs in that set-in sleeves are used. The fit of a set-in sleeve is closer to the body and may appeal to someone who wants a more controlled fitting shift silhouette. Both have a seamless back and don't require a zipper.
These two dresses show vertical seam lines that will create a closer fitting dress that can be used for color blocking, but will not be suitable for stripes because of the several seams down the front.. Clearly they are for a more experienced sewist, Vogue 1390 and 8786. The style of 1390 still shows a strong horizontal banding at hem and shoulder, while it has vertical seam lines to create a better fit for more sizes. Vogue 8786 shows classic princess seam lines from a shoulder yoke that could be sewn in a contrast color with an added hemline panel. While this does have those additional princess seams, it is not a complex dress to sew.
So choose among these 6 shift dresses to find the style and degree of difficulty that you want. This could become your 'go to' dress pattern!
Here are two more blog posts you might be interested in that also talk about sewing dresses:
7 Best Sheath Dress Patterns with Vintage Style: Easy to Sew
9 Best Dress Patterns for Beginners: Easy to Sew
If you liked this blog post, follow me on Bloglovin to keep up with my most current articles on sewing and vintage fashion. If you have any questions, or want to see a post on something specific, just drop me a note or leave a comment here.
You can also find me on:
Facebook - Pintucks
Pinterest - Pintuckstyle
Instagram - Pintuckstyle
Twitter - Pintucks
Tuesday, February 12, 2013
A Closer View: Navy Silk Sheath, c. 1955
One of the best ways to learn fine dress making is to study examples of the craft. This silk sheath dress from the mid-1950's is a great example. It is clearly a custom made dress, with many hand sewn details. By looking at it in detail, we can learn more about the design and drape of this wrapped 'sarong style' dress, along with tips on how to sew a feather weight dress like this that holds its shape well when worn.
This gorgeous navy dress of silk twill has a blue floral pattern that is probably Italian silk. It is backed by lining that is sewn 'in one' with the outer fashion fabric. I use the term 'flat lining' for this process. The lining is also used as a base to hold the drapery in place. It is probable that the customer had a fitting wearing the lining, while the dress designer wrapped the silk fashion fabric around the body, pleating it into the side seams as shown below.
The right and left sides are patterned and sewn differently, creating the signature sarong effect. This sarong skirt is sewn into the sheath side seam on the right, but it wraps around the left without a side seam, hanging open at the center back.
Looking inside the dress we can see the construction techniques. These are classic points. The scarf weight fashion fabric was 'backed' by a lining. The two layers were stitched together, then cut with pinking shears. When pressed open, the stitching shows clearly that this was 'flat lined'.
The transfer marks used to place the darts shows as little white dots. These would have been part of the custom or couture process. Seam tape is sewn along the waistline seam to stablize it and keep it from ripping apart. This tape was also used to edge the hem. Using hem tape is an easy way to provide a clean edge that is easy to sew through.
The bodice of this dress was cut with princess seam lines in the back, while the front had conventional darts. The fashion fabric was draped on top of this and sewn in place. This same lining was used in the skirt, but only to the knee level. This would keep the hips smooth, but allow the hem area to drape nicely.
This wonderful dress is listed in my shop on Etsy where you will find more photos of it. If you like this style, look for designs by Dorothy O'Hara, Helen Rose, and Peggy Hunt among others from that era who specialized in draped dresses. (this dress does not have a label)
Sunday, September 16, 2012
1960 Dress Style: How to Get That Look
Aren't these classic dresses from 1960 cute? They are from a Penney's department store advertisement. The dresses are cotton and use a black and white gingham check. What makes each one special are the details: pockets, borders and banding trims.
When you plan to sew a dress like this, designing the details are half the fun. This ad has very simple dresses when you look at the cut and style, yet the details make each one seem interesting and stylish. All of these elements would be easy to copy using a pattern that has the basic fit.
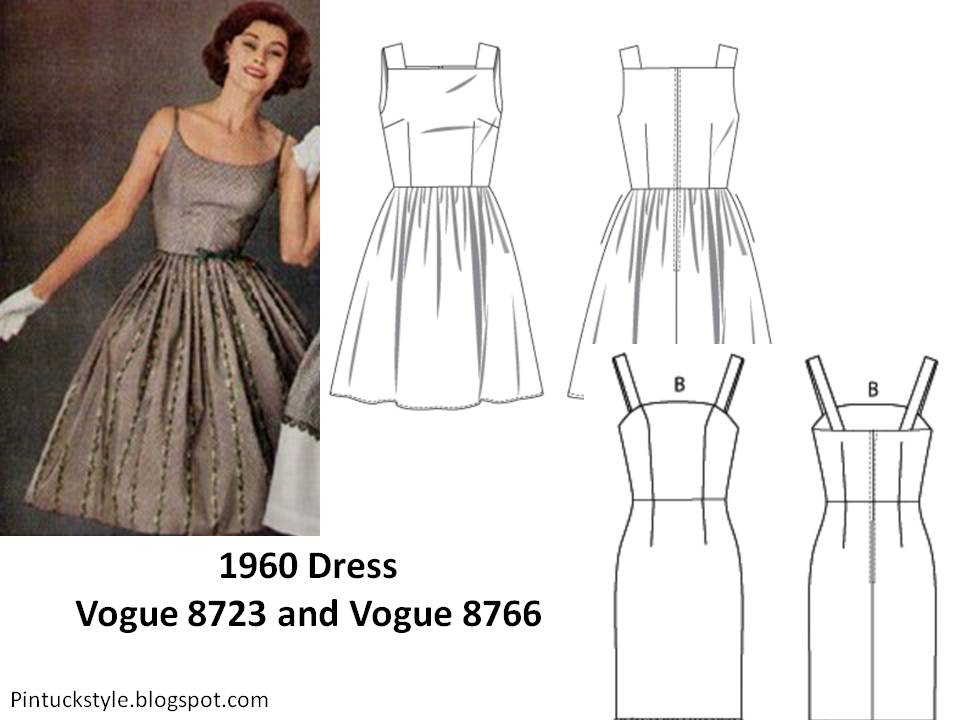
1960 Dresses: I found some current fashion patterns that could be used to sew up your own dress in this early 1960's style. What I looked for were fitted bodices with either simple darts or princess seam lines. For a curvy figure, those princess seams are best, since a clean fit can be shaped down the bodice dart in front. More slender figures can use the simple darted bodices.
It isn't easy to find a current dress pattern with a fitted bodice and gathered skirt. You may want to make your own full skirt. Many of the best full skirts are about 3 yards around, or 108". This was probably due to the fact that their cottons were sold in 36" widths. They would cut 3 panels that were the full fabric width and sew them together down the selvage edges for each skirt.
Some skirts are gathered, others are "knife pleated". These are the small pleats you see in dresses that tend to 'flatten' the skirt around the waistline. For many, this results in a more slender look at the waistline.
Yardage: How much fabric do we need for a full skirt?
1. Measure your length from waistline to hem.
2. We want about 108"(36" x 3)around for this skirt. If we use current 42" wide fabric, we need 3 panels. Two would be the full fabric width, but the third panel is going to be only 24" wide. If your fabric print is large, you may need to make adjustments to plan for the motif.
3. For each panel, add 2" for the hem and 1/2" for the seam allowance around the waistline. This means that yardage for a skirt with three panels would require: 3X length + 7.5".
Next we will look at how to get our details and trims to have the same cute look!
Wednesday, August 1, 2012
Easy to Sew: Make your own Dress
Do you want to try sewing a dress that is easy to sew and looks great, but don't know where to start? Here's a few ideas to start with. The first two patterns are vintage, and the third is a modern take on vintage styles. All are easy to sew up in this gorgeous pink cotton floral print. All are available in the shop this week.
On the first pattern, the "A" line shaping just skims over the figure. This pink dress with the bias cut collar is a silhouette that is very flattering on figures with curvey hips. It is a vintage pattern by Simplicity 7625 from 1968. When finding patterns, look for "A" line shift styles like this that have simple darts and 2 main pattern pieces.
Hate to sew zippers? This second pattern is a super straight shift style that has only side bust darts. Chances are you may be able to get away without sewing in a back zipper if the dress slips on over your head! Look for vintage pattern Simplicity 4471 from 1964.
For a modern fit, I like this third pattern, a discontinued McCall's 4768. Although it has only 2 main pattern pieces, the upper body is shaped by princess seam lines. Princess seams are the best way to fit a curvey bustline because you can make adjustments for a perfect look. The flutter hem detail is optional, so this pattern is perfect for a slender sheath dress project.
When it comes to sewing, this pink floral fabric is an easy to sew cotton sateen that has a smooth finish. This is a recent textile with a vintage look, and it would be perfect for sewing any of these dresses.
You may have noticed that I selected sleeveless styles for this group. That will save you time and energy spent sewing in sleeves. When fall arrives, just throw on a cardigan and tights, and you'll wear your dress into the cooler weather.
Wednesday, August 31, 2011
Vintage Detail: Red Silk Dress c. 1960
This dress is fully lined. The hem appears to have been shortened. All beaded has been sewn by hand around the neckline and wrists of the long sleeves. The waistline has piping to match. Small hooks and thread loops are sewn at the neckline and waist of the center back metal zipper.
click on the photos to enlarge themr
Friday, January 7, 2011
How to: COPY a DRESS or KNOCK-OFF a PATTERN
This tutorial will show you how I made a pattern from this vintage mid-1950's cotton dress. I chose a very simple style, one with short kimono style sleeves that are cut in one with the bodice. I also used a style with only one simple bodice dart in both front and back.
As you follow these photos, you may want to 'click' on the image to see an enlarged version, as some details are small.
tools and materials:
Cork Board: I use a large old bulletin board
Paper: I use plain white butcher paper, because that is easy to find. Using the BACK side of old gift wrap in a wide width can work as well. If you have access to pattern 'dot' paper, then that is best. But I will show you how to work without that grid.
Ruler: A 12" or 18" ruler and a yard stick
Pins: I prefer pearl head pins because they are easy to use and see.
Pattern Wheel: This is ideal, but I will also show you how to use a pin to create marks if you don't have this tool.
Pencil: sharp
Dress: Pressed and smooth
TERMS: I will use the following terms
Grainline and On Grain: this is the 'up and down' direction that follows the yarns (warp) that would have been tied to the loom. It is a perfect vertical line.
Cross Grain: This is the 'side to side' yarn direction, that follows the yarns (weft or fill) that would have been woven across the loom. It is a perfect horizontal line that is exactly perpendicular to the Grainline.
Bias: This is a perfect diagonal line (45 degrees) created when the vertical grainline and horizontal cross grain line are folded together. This is the same line that is created when a bandana is folded to create a triangle. This diagonal has stretch properities.
Selvage: This is the fabric edge. Traditionally it is woven when the cross grain yarns (weft or fill) turn and weave back across the fabric. More modern wide with textiles may have a 'fringey' selvage.
Center front (CF): This is the front line of a garment. It can be found when the sides of the garment are evenly matched together, creating a fold (center front fold). In most garments, this is on grain and oriented perfectly vertical on the textile.
Center back (CB): This is the perfect back line of a garment and is determined the same way as center front.
Work from the inside of the garment, match up the dart seams, side seams and neckline, pinning those together. This will produce a center back fold. You may press this flat
Step 2: Draft the center back line on paper
Lay a length of paper about 18" long on your cork board, pin the corners down.
Use your ruler to draw a sharp line that is about 18" long with at least 15" of paper width on one side. I turn the board sideways, and will work that way in the photos.
Lay your back bodice that is pinned so that the center back fold is exactly on the drafted line. Here I use my ruler to guide me. I then pin the fabric from waist to neckline on this fold.
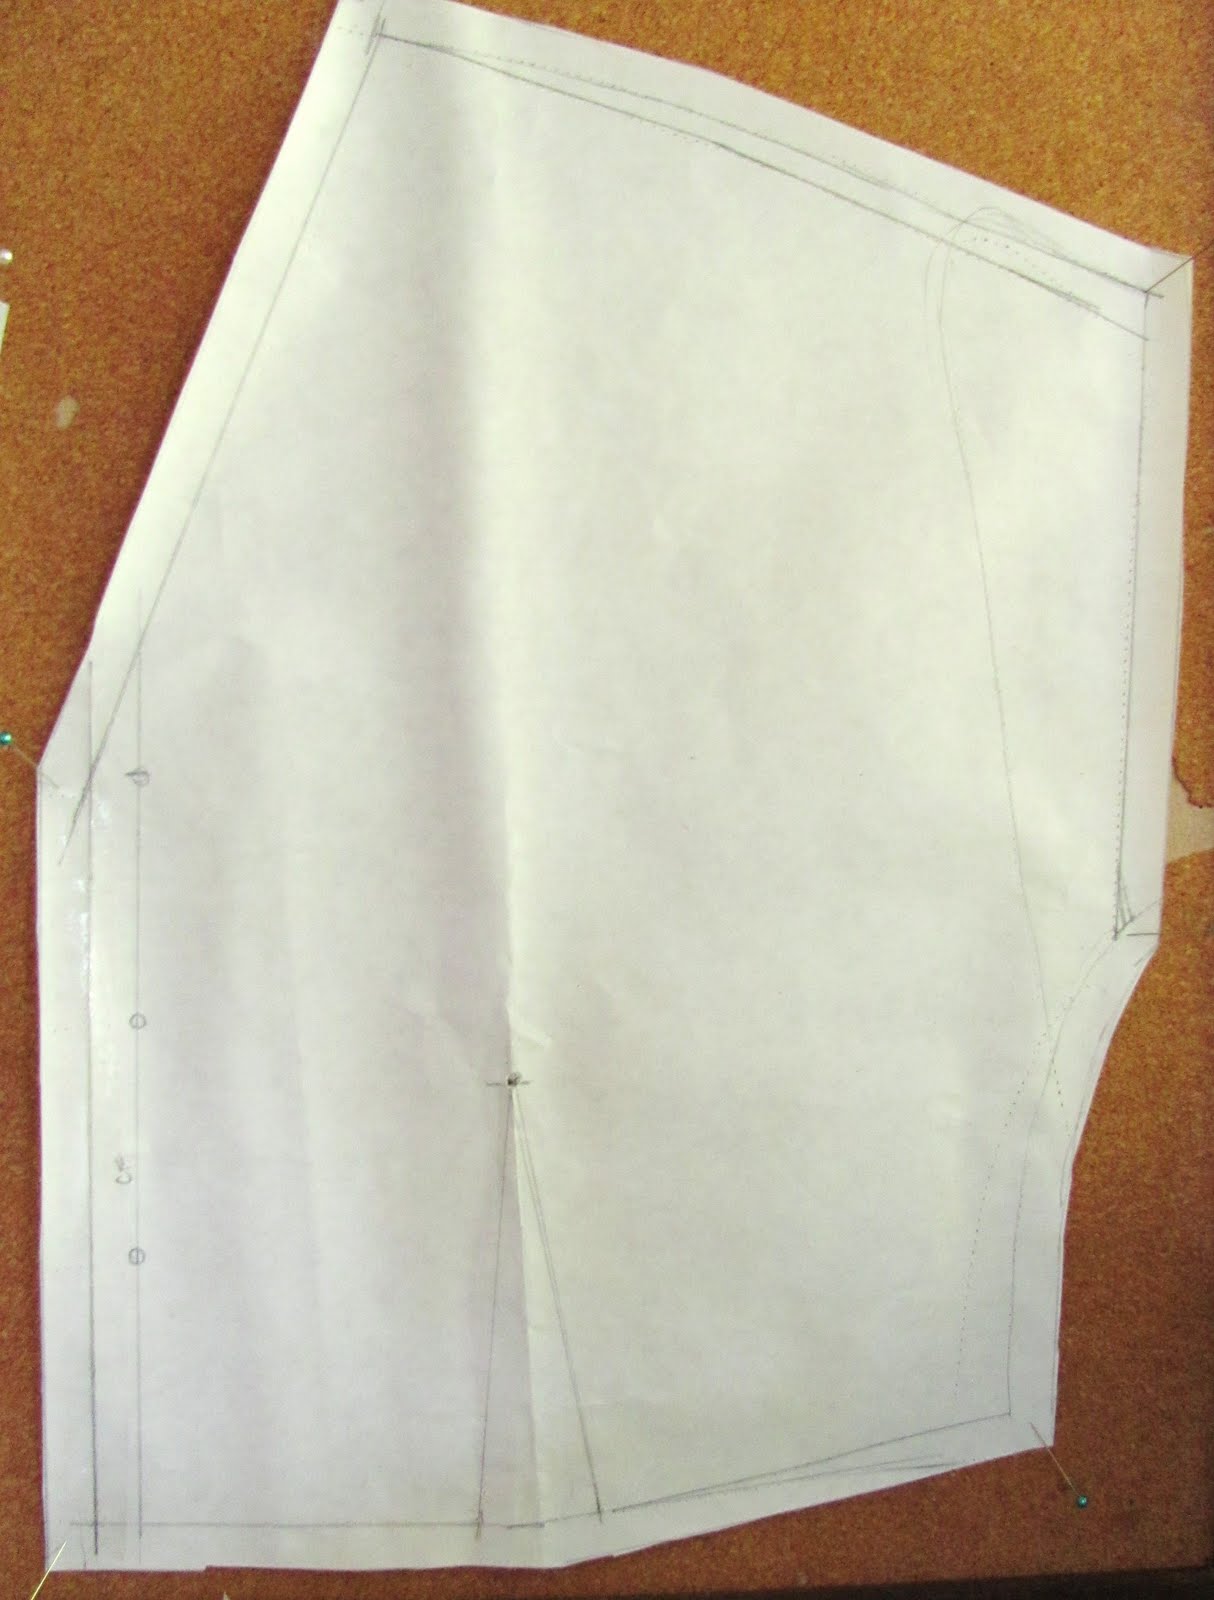
Run the pattern wheel down the edge of your CB fold.
Run the pattern wheel along the waistline and neckline as far as you can without getting into any pulled areas.
Alternative method: using a long pin (corsage pin works well), run a length of 'stab' punches down the fold line. I just 'hop' the pin down the line, creating a length of pin dots.
NOTE: When I pin, I use a technique where two pins are in a "V" position. This helps to keep them fixed in place and not pull out.
Step 3: Draft the Dart: In this photo you can see how the dart tip is also pinned down. It is important to keep the grain of the fabric straight. The yarns should stay in a perfect 'grid' orientation, and not be stretched towards a bias or diagonal.
Run the pattern wheel up the dart seam line from waistline seam to the point. Accent that point with a cross mark to create a bulls eye "T".
Step 4: Bodice side and shoulder seams: It may be necessary to remove the CB pins as you smooth the garment towards the side seams. Smooth a perfect horizontal out from the point of bust and pin that point.
SUGGESTION: Work out from the dart's point to smooth out the fabric towards each seam line. Think of this like the center of a clock with the hands radiation outwards. This will maintain the dart's position, and the fabric grainline more easily.
You will need to release the dart pins that are in place from the waistline to the point below the dart point. As you smooth the fabric, the dart should pivot a bit away from that original location. This is forming the dart's tuck of excess fabric.
- work flat and smooth
- keep the fabric on grain, don't stretch it on the bias or make it 'crooked'.
Button front: Where is center line if there are buttons? This line usually runs down the center of the button line (or the dot where each button is sewn in place). You can make a pin 'punch' where each button is centered.
NOTE: I worked the front pattern from the good side of the garment. You can see that the fabric pattern and details are facing out. I did this to make the buttons, collar and cuff easier to see.
When using this method, I did not pre-draft the CF line because it is under my dress front and I can't see it. I drafted the CF line after removing the dress from the paper. I had a row of pin punches to denote that CF line, so it was easy to find.
Collars and Cuffs: How can I draft these shapes? These are the easiest pieces to work with. Just flatten each onto the paper, and pin flat and smooth. You can trace the outside edges with a pencil, and use the pattern wheel to outline the seam where it is sewn into the dress.
NOTE: As you draft, remember that these are seam lines, and you will need to add your seam allowances to this pattern. Generally these are 1/2" in the fashion industry, and 5/8" for home sewing patterns.
NOTE:
A seasoned patternmaker once told me "There's more than one way to skin a cat".
Meaning: This is only one method to produce similar results. As you work and gain experience, you may develop different techniques. Or perhaps you will be taught a different method by someone else. Regardless, as long as the technique produces the desired results, any way is OK.
Going Further:
Fit Sample:
Cut a fitting sample from the same type of fabric as your vintage dress. My dress is simple cotton, so any cotton or plain muslin will work in this case. I will add side seam allowance to make a 1" seam allowance at each side. I recommend this in case you need more room during the fitting.
Draw the seam lines from your pattern onto the muslin in a red sharpie or marker, and it will be easy to follow. With the fitting, use a 2nd color marker to show new alterations. Transfer those new seamlines into a 2nd pattern. If you don't need to make many changes, this 2nd pattern should be ready to use with your fashion fabric.
SEWING the DRESS:
The following vintage sewing posts may help you to sew your dress:
How to sew Flat Lining
How to sew a Fitted Bust Dart
Saturday, January 1, 2011
The Party Dress Book by Mary Adams: a Book Review
The pattern itself may seem complicated for a beginner to work with, but similar patterns are available in purchased patterns, if that approach is easier. In fact, a purchased pattern might provide helpful supplementary sewing instructions not given in the book.
This bodice is shown without boning, which will make it soft, without structure. With this style, shoulder straps are essential. I am guessing the author left out boning to make the pattern easier. Having a purchased pattern may help to advise the sewer who wants a boned bodice instead.
I highly recommend this book as a source of inspiration, along with a great series of tutorials on how to create texture and visual interest when sewing fashion. This is something that has been left out of fashion sewing in recent years, so for many this may be a first peak into new territory for sewing.
Book: The Party Dress Book, How to Sew the Best Dress in the Room
Author: Mary Adams
Publisher: Watson-Guptill, 2010
Binding: spiral bound
Skill level: Intermediate
(With a purchased pattern, this book could be used by someone who has fit and sewn a dress or two successfully, and is ready to be more creative.)
Suggested:
This book will appeal to anyone who loves fanciful and creative fashion.
It is the perfect engagement gift for a creative bride to be.
This is equally fun as a 'look book' for someone who doesn't sew but loves new ideas.
It is also an interesting read to learn about the author's own career in the arts and fashion.
Supplimentary Patterns:
The following commercial patterns may be used when making the dress shown in this book.
Princess bodice, with sweet-heart neckline:
Simplicity 4070
New Look 6805
Princess bodice, with flat neckline:
Butterick 5322
Butterick 4443
Simplicity 2440
Tweet
Subscribe to:
Posts (Atom)