Saturday, May 25, 2013

50s Dress Fabrics: Embroidered Borders @ Prints


Sewing vintage or retro dress styles requires a great fabric to compliment the silhouette. I was lucky enough to find a collection of embroidered designer dress fabric from the 1950's in silk and cotton recently. This type of fabric is perfect for skirts with fullness and shape, such as the ones in these new Butterick patterns.

Embroidered fabric is also a wonderful texture to add to any dress design. When they have borders, try using this fabric alone in the skirt and pair it with a sold colored bodice. All-over patterns work well sewn up in the entire dress. If you are going to try making a 50s retro style dress, take a look at these vintage fabrics.


This gingham check border embroidery shows how border designs are also perfect for strapless bustiers and other horizontal necklines. This is a cute cotton fabric with white embroidery, it's so 50's!


It's always nice to find light weight prints from this era when you want to sew a fuller skirt or summer dress. The gorgeous large scale butterfly pattern here would be perfect in a wide or gathered skirt where the design could be seen. It is a cotton crepe that has a matte finish and a very light quality.

Find these fabrics now at Pintuck Sew, or click on the description below:

Yellow sheer cotton voile with white embroidered leafy border

Brown silk organza sheer with white all-over daisy design

Yellow cotton gingham with white embroidered daisy border

Purple sheer cotton voile with white embroidered leafy border

Blue butterfly all-over print on cotton georgette

Friday, May 24, 2013

New Retro Dress Patterns from Butterick: 5920 & 5930

Have you seen the latest retro dress patterns from Butterick?  I especially love Butterick 5920 and 5930 for sewing vintage fashion styles .   These two dresses have great details and nice vintage silhouettes. What is even more fun? The model for pattern #5930 is a real girl with curves, so we get a chance to see what it will look like on many of us out here who sew for ourselves.

When it comes to making alterations, I think that either bodice will modify easily without distorting the style.  Model #5920 is a very simple design with few pattern pieces.  The bodice is darted to fit, without sleeves or other details that might add more difficult details to the sewing process.  The skirt is 'A' line with a smooth back and gathers only in the front.  This is an easy skirt to modify into full gathers or other shapes.  This fitted bodice can be made to fit tight or loose, depending on your style.  I also think it would be adorable in a summer cotton such as gingham, cut short and sweet.

The princess seamlines in the bodice of #5930 will help to create a great fit, regardless of the body type.  The gored skirt has fullness in the hem without the bulk of gathers at the waistline and hips, so it should be a very flattering design to wear.

If you have an event this summer, these patterns could be what you are looking for!


Friday, May 3, 2013

Get to Know your Serger Machine


If you are learning to use a serger or overlock machine, you may be a bit overwhelmed.  Looking for help?
Try Serger Basics.  It's easy to read, concise and full of good tips on how to use this type of machine.

This pdf file is also great for the experienced serger user.  It has clear diagrams for trouble shooting tension adjustment so your stitches come out even.  For the novice, there is a clear drawing of the average serger (shown above) with each part clearly labeled.  If you use a serger, or plan to, I suggest that you print this pdf article, so you have something to refer to as you get started, or come across little questions when you sew.

This pdf article is part of a wide range of sewing instructions and tips by the University of Kentucky.  It's really an entire sewing textbook available at no cost online.

Serger Basics, Level I:  UK Cooperative Extension Service: University of Kentucky, College of Agriculture, written by Marjorie M. Baker, Extension Associate for Clothing and Textiles.  A full list of articles is available online.

Monday, April 8, 2013

Cashin Coat for Spring: 1966


Bonnie Cashin's vision for Spring 1966 shows her love of texture and inventive silhouettes.  This kimono inspired coat has unique angled sleeve lines, with a diagonal wrap closure that ends in an upswing hemline.  All edges are bound in leather, which would have been colored to compliment her custom wool textiles. Doesn't it have an exciting look?  I think it could be adapted and worn today, which is one of the amazing elements about a Cashin design.


Wednesday, April 3, 2013

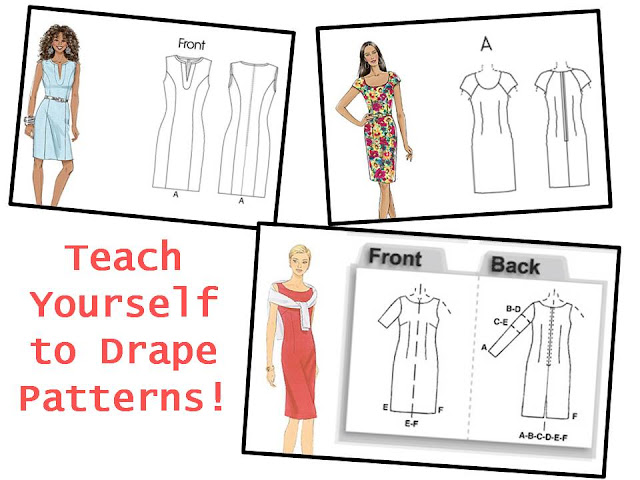
Teach Yourself to Drape Patterns: How to Get Started

 
Let's Talk About: Fashion Design
When you have fashion design ideas, one of the first skills you need to have is creating an original pattern.  If you cannot take a pattern design class, it can be very frustrating to learn how to make a pattern.  There are two main ways to produce a pattern.  The draping method uses a professional dress form, laying fabric on it to create the desired garment style.  The flat drafting method uses measurements to create a drafted pattern.  Often the draft is actually a manipulation of a pre-existing pattern.

Most students begin with pattern draping.  After learning to work with fabric on the 3-D form, their pattern can be traced onto paper and used for future patterns.  The following information will be based on learning how to drape patterns.

Before you start: the first purchase must be a dress form.  While these can be costly, they are essential for all types of design and sewing, so it is as important to own as your sewing machine.  What size to buy?  If you plan to create designs that might later be sold, you should consider a sample size "8" to start.  This is generally considered a basic size.  If you have a specific target market, get your dress form in their 'average' size and shape.  If you are sewing for yourself, then that size would be best.  If you are looking at an older dress form, brands such as "Modern Model" and "Wolf" are common.   "PGM" is a more recent brand that is imported.

Professional dress forms will have the following:

strong, sturdy base with wheels and adjustable height pedal
collapsable shoulders (used to pull off skirts)
princess seam lines in the muslin cover
shoulder plates where the armholes should be
pin-able surface
 
Tools and Supplies for Pattern Draping:

Pins: long pins are best for working on a dress form
L ruler, aluminum:: 24" x 14", this is a metal ruler with a right angle
Clear ruler: this "C through" 18" long x 2" wide ruler has a grid mapped on it.
Measuring tape: plastic

Marker: many students use 'sharpie' brand markers
Pencil: a standard desk type pencil can be used
tailor's chalk: a chalk that is thin and flat for sharp lines
Shears: you will want 8" sharp fabric shears for cutting your yardage
Muslin: 100% cotton is required.  A medium weight is best (don't use a thin, cheap muslin)
Twill tape: 1/4" wide tape will be used to wrap around the dress form to mark specific body areas

Tools and Supplies for transfering muslin pattern to paper:

tracing wheel or pattern wheel: sharp needle point wheel with wooden handle
awl: to punch holes in the paper
French curve: clear plastic curve to draft smooth lines around curves
hip curve: 24" long, a larger gentle curve used to draft smooth lines
pattern notcher: 1/16", used to mark pattern edges
dot paper
manila paper or other heavy paper such as 'butcher paper'
heavy scissors: for cutting paper

Tutorials for learning Pattern Draping:

Before starting a draping program, the student should have a good understanding of sewing and some experience working with patterns. Before beginning a drape, it would be a good idea to purchase the same style pattern first, then cut and sew it before learning to drape it.  

A series of tutorials for 10 garment processes along with how to prepare the dress form is available online through Cornell University, HERE.  Each process is shown in a step-by-step format.  The entire set of tutorials equals about one or two semesters of classroom projects at the college level. A draping text is recommended as a guide.  This series assumes the student is an intermediate level sewist, who has experience in sewing the garment being draped. 

Videos: With so many videos available online, it's tough to select tutorials that are well planned and accurate.
Craftsy.com has a full series of pattern draping tutorials taught by Paul Gallo.  They are well priced, and appear to be comprehensive enough to get a student started in the draping technique.  On youtube.com this short video on draping by PandemicApparel is also a good place to start if you don't want to spend a cent before you get a 'feel' for this process:


References:  You can never have too many good books.  These are typical titles used in fashion draping courses:

Draping Basics, by Sally Di Marco.  I recommend this first due to the great tutorial photos.  She works with gingham fabric, which clearly show the grainlines while working.  There is a pdf preview online:  HERE
The Art of Fashion Draping, by Connie Amaden-Crawford
Draping for Apparel Design, by Helen Joseph-Armstrong
Draping for Fashion Design, by Hilde Jaffe

Shopping Resources: Most tools and supplies can be found online if you aren't located near a fashion college's student store.  One popular vendor is IDS International Design Supplies, Inc., Los Angeles and student kits are available: HERE

I hope this helps you to get started learning pattern design. If you have any questions--just ask and I'll get back with an answer!

This original article on fashion is part 10 of a series called "Let's Talk About:" that is posted only here at Pintucks. The contents of this article are the intellectual property of this blog. Please do not copy any content or images to another blog or digital media without contacting me first. I will ask that you link back to this article and give reference to this source within your feature. If you are using content or images for a research paper or project, please link back to this page in the traditional academic format, thank you!


Tuesday, March 19, 2013

Princess Diana's Gowns: Up for Auction


Today ten gowns worn by Princess Diana will go up for auction in London. These gorgeous gowns date from the late 1980's and early 1990's. They all seem to share the glamour of that era. The gown shown here is by Catherine Walker from 1991. Other important gowns, such as the off-shoulder navy velvet down that she wore to dance with John Travolta are included in this auction at Kerry Taylor Auctions.

There are more details on this auction with photos HERE It's a great collection fit for a princess!

Saturday, February 16, 2013

Vintage or Retro: 1950's Sun Dress


Isn't is amazing how REAL vintage is often better priced than the copies? This example compares a light blue denim 1950's sun dress with a super cute buttoned back against a new retro style copy in orange. As you look closely, notice that the vintage has many more details, like the great pockets. Both have eye catching full skirt panels in multi-color tones, both are sleeveless with scoop necklines.

When is comes to comfort, the orignal denim model is all cotton, while the copy has more polyester than cotton in the fabric. Both have back details, the 50's style actually buttons closed, so it can be made to fit just by moving a few buttons over. The new version has fake buttons and a side zipper.

What really boggles the mind is that the copy is nearly $100, but the original dress is less than $90. Kinda makes you stop and think, doesn't it!


Original Dress is for sale HERE in our PintuckStyle shop on Etsy.

Copy dress is available at ModCloth, which lists "vintage clothing" in the tag (shame on them!)

Tuesday, February 12, 2013

A Closer View: Navy Silk Sheath, c. 1955


One of the best ways to learn fine dress making is to study examples of the craft. This silk sheath dress from the mid-1950's is a great example. It is clearly a custom made dress, with many hand sewn details. By looking at it in detail, we can learn more about the design and drape of this wrapped 'sarong style' dress, along with tips on how to sew a feather weight dress like this that holds its shape well when worn.

This gorgeous navy dress of silk twill has a blue floral pattern that is probably Italian silk. It is backed by lining that is sewn 'in one' with the outer fashion fabric. I use the term 'flat lining' for this process. The lining is also used as a base to hold the drapery in place. It is probable that the customer had a fitting wearing the lining, while the dress designer wrapped the silk fashion fabric around the body, pleating it into the side seams as shown below.

The right and left sides are patterned and sewn differently, creating the signature sarong effect. This sarong skirt is sewn into the sheath side seam on the right, but it wraps around the left without a side seam, hanging open at the center back.


Looking inside the dress we can see the construction techniques. These are classic points. The scarf weight fashion fabric was 'backed' by a lining. The two layers were stitched together, then cut with pinking shears. When pressed open, the stitching shows clearly that this was 'flat lined'.

The transfer marks used to place the darts shows as little white dots. These would have been part of the custom or couture process. Seam tape is sewn along the waistline seam to stablize it and keep it from ripping apart. This tape was also used to edge the hem. Using hem tape is an easy way to provide a clean edge that is easy to sew through.

The bodice of this dress was cut with princess seam lines in the back, while the front had conventional darts. The fashion fabric was draped on top of this and sewn in place. This same lining was used in the skirt, but only to the knee level. This would keep the hips smooth, but allow the hem area to drape nicely.


This wonderful dress is listed in my shop on Etsy where you will find more photos of it. If you like this style, look for designs by Dorothy O'Hara, Helen Rose, and Peggy Hunt among others from that era who specialized in draped dresses. (this dress does not have a label)

Sunday, January 6, 2013

Audrey's Trench Coat


A bit of inspiration for winter styling, this adorable photo of Audrey Hepburn and Cary Grant comes from 1963, and shows her wearing a trench coat, as she made so popular in "Breakfast at Tiffany's" a few years earlier.

Photo source: "Look" magazine, December 1963 (nearly 50 years ago!)